Creating an AWS S3 Static Site with SSL and Existing DNS Hosting
Sometimes it can be useful to create just a static, internet accessible
web server without having to re-organize your entire DNS or general
domain infrastructure. That's what I wanted to do with
static.6thstreetradio.org, so I could serve up very important pictures
like this one:

There are a number of existing HOWTOs about this, but each one assumed that you would use Amazon to handle ALL things about your domain, including the DNS server. In other cases, it disregarded the need for an SSL connection. This puts all the requirements together:
Step 1: Create the bucket
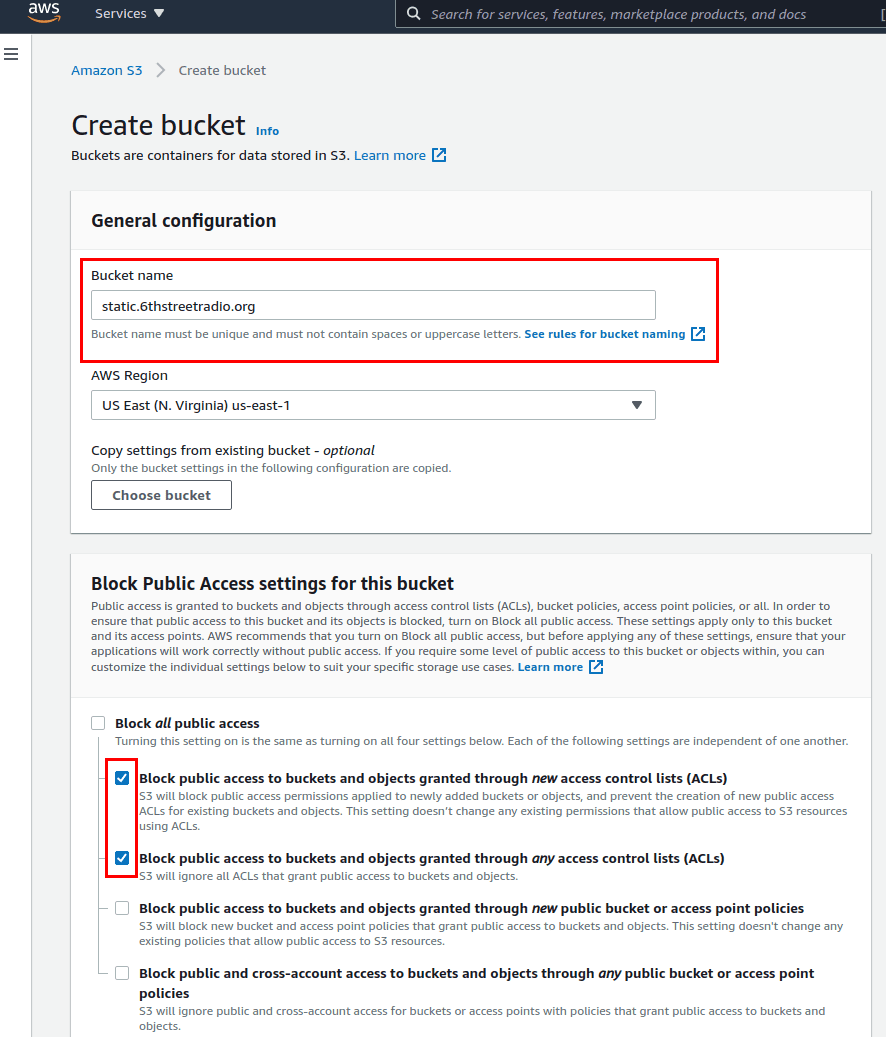
- In the AWS console, open the S3 app and click "Create Bucket"
- Make sure the "Bucket Name" is the FQDN of the site.
- Uncheck "Block all access" and check the two top boxes to block access via ACLs.
- Click "Create Bucket"
- Edit the bucket policy. This is found under
"Permissions -> Bucket Policy". It will end up
looking something like this (edit the "Resource" to match
your bucket + "
/*" at the end):
{
    "Version": "2012-10-17",
    "Id": "Policy1630595922",
    "Statement": [
        {
            "Sid": "Stmt1630595922",
            "Effect": "Allow",
            "Principal": "*",
            "Action": "s3:GetObject",
            "Resource": "arn:aws:s3:::[BUCKETNAME]/*"
        }
    ]
}- Upload the static site's files to the root of the bucket.
Note: you do NOT have to enable static web hosting. We will
take care of that in CloudFront.
Step 2: Create A Certificate
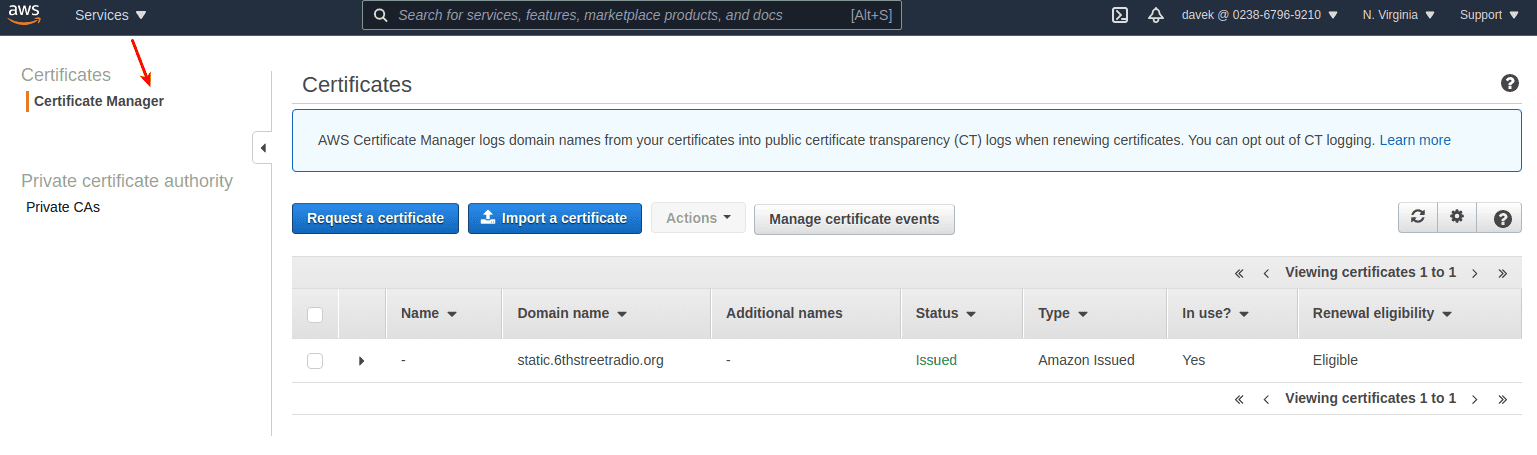
- Open the "Certificate Manager"
- Click "Request a Certificate" for the domain you are creating. In my case, I was able to do "email authentication", which sends a message to the email associated with the root domain. Otherwise you will have to alter the DNS record to prove you own the domain.
Note: There is no step to configure "Route 53" DNS in AWS because this HOWTO assumes that DNS is managed outside of Amazon.
Step 3: Create CloudFront Distribution
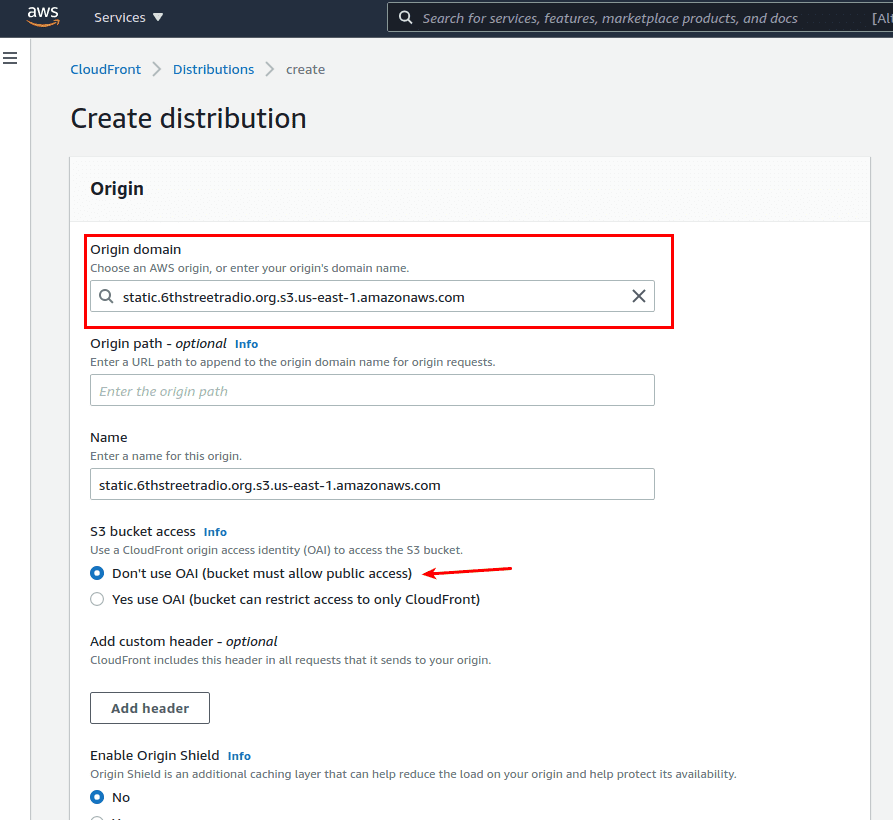
- Open "CloudFront" and click "Create Distribution."
- Click the dropdown list for "Origin Domain" and select the S3 bucket you created earlier.
- Select "Don't use OAI", since we manually set up the policy earlier.
- Important: Scroll down to "Alternate Domain Name (CNAME)". Here you enter the FQDN of the domain you're trying to create. In my case, it is static.6thstreetradio.org.
- In "Custom SSL Certificate", expand the drop-down and select the certificate you created in an earlier step.
- Scroll down to "Default root object" and input
index.html(or whatever you want your index page to be). - All other options can be left as defaults.
- Click "Create Distribution". It normally takes several minutes for the deployment to complete.
Step 4: Create The Final CNAME
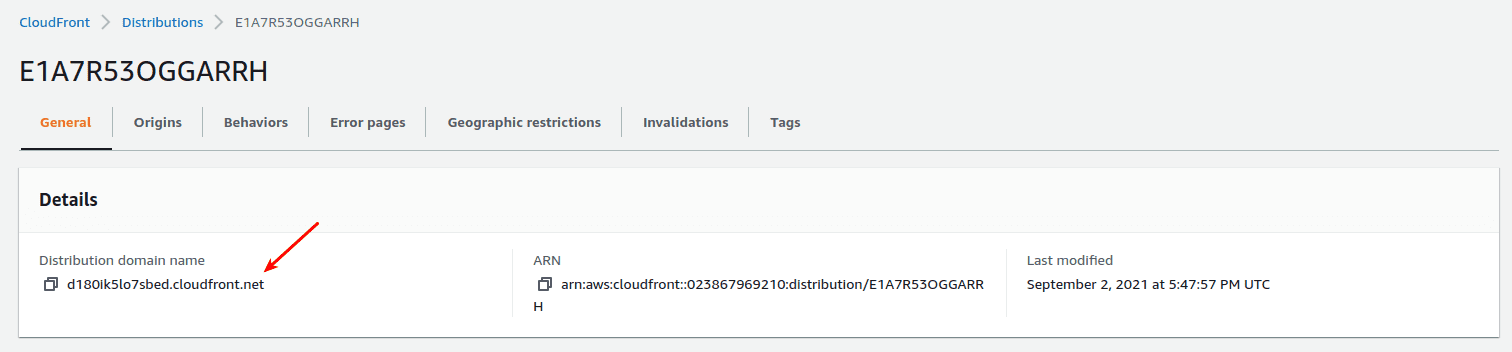
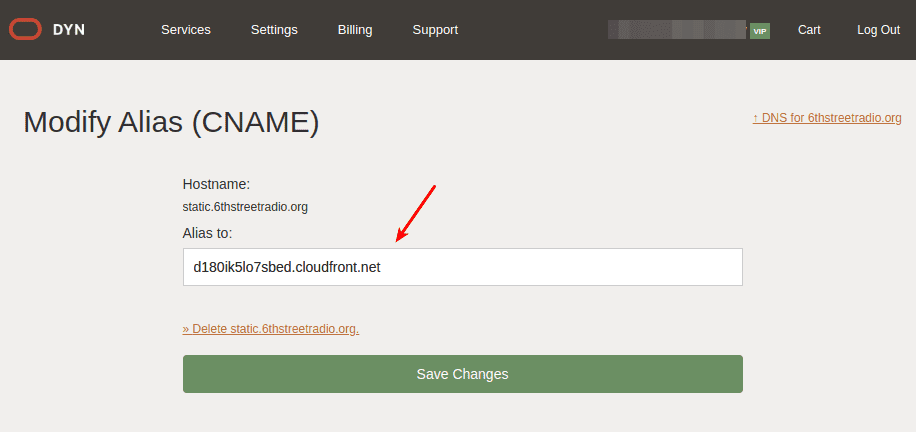
- After deployment, open the CloudFront domain and copy the "Distribution domain name." This is the public domain Amazon created for the site.
- Switch to your DNS provider, and create the subdomain you want as a CNAME mapped to the domain created by AWS.
DONE
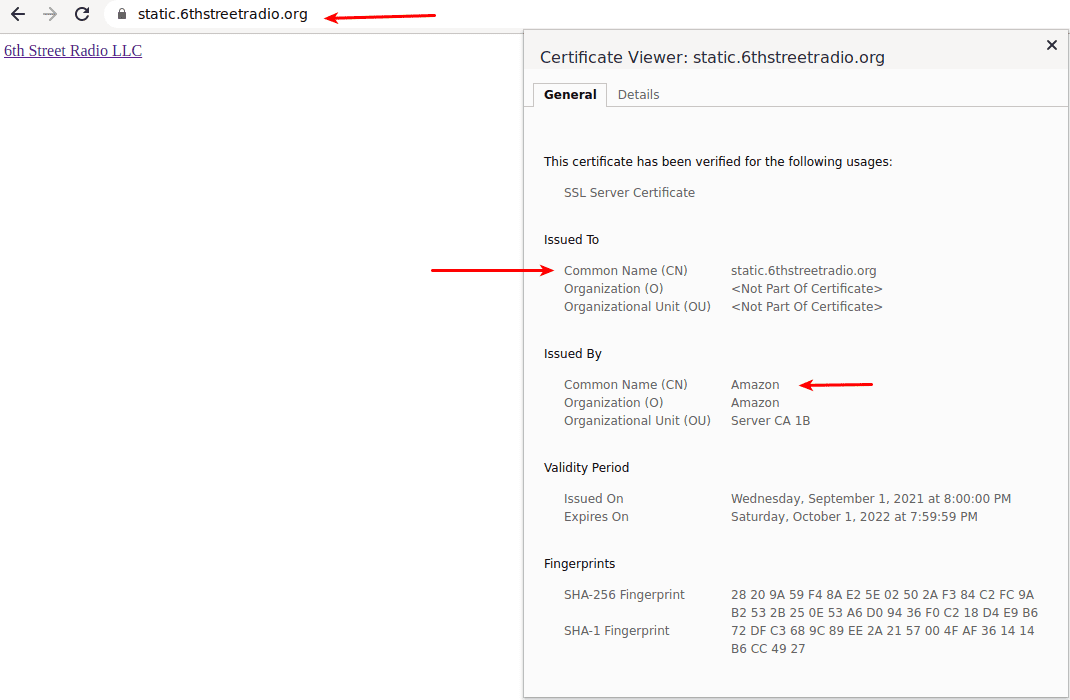
And there you have it. A public, SSL-enabled site based on an S3 bucket with cloudfront on the backend and a simple CNAME added to an existing domain.
Many of these steps were adapted from https://www.freecodecamp.org/news/cjn-how-to-point-your-domain-to-s3-website-bucket/ and https://howtodoitoncloud.medium.com/hosting-a-static-website-on-aws-s3-with-ssl-acfa6d6dbbd .